1. Modificamos la clase employee y agregamos el anotation XMLRootelement y XmlAccesorType(XmlAccessType.NONE). Tambien agregamos el anotation @XmlElement para cada uno de los campos de la clase.
package com.model;
import java.io.Serializable;
import java.util.Date;
import javax.xml.bind.annotation.XmlAccessorType;
import javax.xml.bind.annotation.XmlElement;
import javax.xml.bind.annotation.XmlRootElement;
import com.fasterxml.jackson.databind.annotation.JsonSerialize;
import com.fasterxml.jackson.databind.ser.std.DateSerializer;
import javax.xml.bind.annotation.XmlAccessType;
@XmlRootElement(name = "employee")
@XmlAccessorType(XmlAccessType.NONE)
public class Employee implements Serializable {
private static final long serialVersionUID = -7788619177798333712L;
@XmlElement
private int id;
@XmlElement
private String name;
@XmlElement
private Date createdDate;
public Employee(Integer id, String firstName, Date d) {
super();
this.id = id;
this.name = firstName;
this.createdDate = d;
}
public Employee() {
super();
}
public int getId() {
return id;
}
public void setId(int id) {
this.id = id;
}
public String getName() {
return name;
}
public void setName(String name) {
this.name = name;
}
@JsonSerialize(using = DateSerializer.class)
public Date getCreatedDate() {
return createdDate;
}
public void setCreatedDate(Date createdDate) {
this.createdDate = createdDate;
}
}
2. Para agrupar varios objetos empleados, creamos una clase de servicios de la siguiente manera, se agrega el XmlRootElement y el Xmlelement de la clase employee.
package com.services;
import java.io.Serializable;
import java.util.ArrayList;
import java.util.List;
import javax.xml.bind.annotation.XmlElement;
import javax.xml.bind.annotation.XmlRootElement;
import com.model.Employee;
@XmlRootElement(name = "employees")
public class EmployeeService implements Serializable {
private List<Employee> employees = new ArrayList<Employee>();
private static final long serialVersionUID = 1L;
@XmlElement(name = "employee")
public List<Employee> getEmployees() {
return employees;
}
public void setEmployees(List<Employee> employeeList) {
this.employees = employeeList;
}
}
3. Agregamos las dependencia para las librerias de XML en el archivo pom.xml
<dependency>
<groupId>javax.xml.bind</groupId>
<artifactId>jaxb-api</artifactId>
<version>2.1</version>
</dependency>
<dependency>
<groupId>com.fasterxml.jackson.core</groupId>
<artifactId>jackson-core</artifactId>
<version>2.9.1</version>
</dependency>
<!-- https://mvnrepository.com/artifact/com.fasterxml.jackson.core/jackson-databind -->
<dependency>
<groupId>com.fasterxml.jackson.core</groupId>
<artifactId>jackson-databind</artifactId>
<version>2.9.1</version>
</dependency>
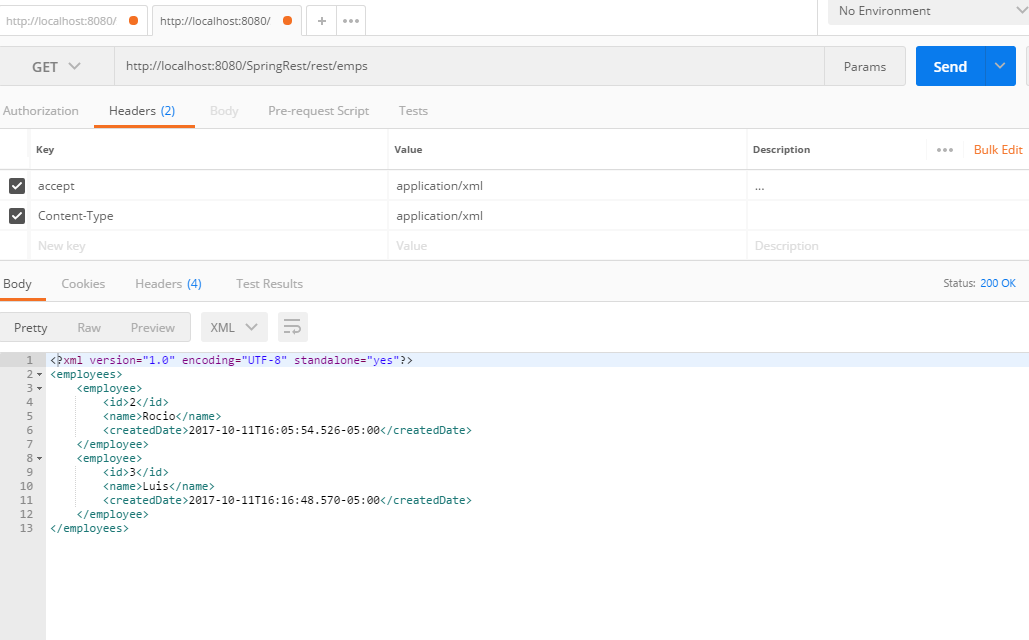
4. Modificamos la clase getAllEmployees en EmployeeController del ejemplo de Json, y lo ajustamos de la sigueinte manera:
@RequestMapping(value = EmpRestURIConstants.GET_ALL_EMP, method = RequestMethod.GET)
public @ResponseBody EmployeeService getAllEmployees() {
logger.info("Start getAllEmployees.");
EmployeeService objServices = new EmployeeService();
List<Employee> emps = new ArrayList<Employee>();
Set<Integer> empIdKeys = empData.keySet();
for (Integer i : empIdKeys) {
emps.add(empData.get(i));
}
objServices.setEmployees(emps);
return objServices;
}
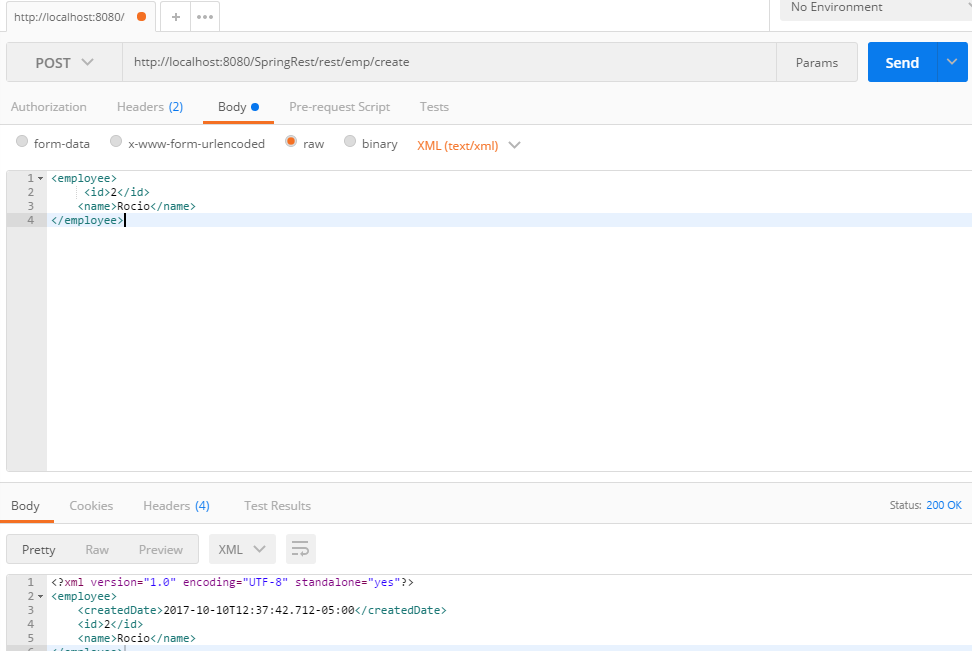
4. Vamos a probar el servicio web usando xml y json combinadamente, para empezar vamos a crear un nuevo registro de empleado metodo POST con el siguiente body:
<employee> <id>2</id> <name>Rocio</name> </employee>
Agregar los headers:
Accept: text/xml
Content-type: text/xml
http://localhost:8080/SpringRest/rest/emp/create

Ahora extraemos el empleado recien creado de la siguiente manera:
http://localhost:8080/SpringRest/rest/emp/2
Agregar el header:
Accept: text/xml
Obtendremos el siguiente resultado:
<?xml version="1.0" encoding="UTF-8" standalone="yes"?>
<employee>
<createdDate>2017-10-10T12:37:42.712-05:00</createdDate>
<id>2</id>
<name>Rocio</name>
</employee>
Agregar el header:
Accept: application/json
Obtendremos el siguiente resultado:
{
"id": 2,
"name": "Rocio",
"createdDate": 1507657062712
}
http://localhost:8080/SpringRest/rest/emp/create
Accept: application/json
Content-type: text/xml

http://localhost:8080/SpringRest/rest/emp/create
Accept: application/xml
Para extraer todos los empleados.
http://localhost:8080/SpringRest/rest/emps
No hay comentarios:
Publicar un comentario